Table of contents
Executive summary
- Access to the dashboard
- Add / Edit Posts
- Post views
- Documents view
- Media library
- Home Page slider
- Post on the right section
- Edit Pages
- Stay Tuned section
Executive summary
This guide is focussed to manage contents related to the sections News and events and Documents , in each national website.
The procedures described allow each national web manager to upload news, pictures, project deliverables, technical articles and dissemination materials (document sections). Each section of this guide highlights the available tools to be used in order to periodically update the national pages.
The Networking section will require updates as well. The tools to manage this section are described in par. 8.
The Project and Consortium sections are static pages. If you need support to modify or update them, please contact boris.nanni@gmail.com.
The uP_running site will be periodically improved by the website administrator and the Users’ guide updated accordingly.
1. Access to the dashboard
- Link to the backend of up-running.eu:
– Link: www.up-running.eu/wp-admin
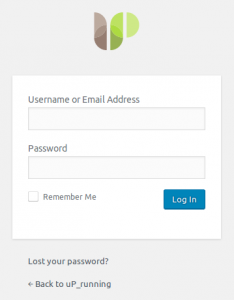
On this page, type username and password to access on network dashboard.
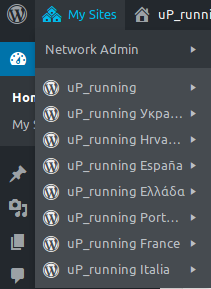
An Editor user can manage one or more websites.
Select the site (“My Sites” menu, on top left of the dashboard) to be managed among the available ones according to the user’s permissions with which you are connected.
In this example, the user can manage all websites on the network.
2. Add / Edit Posts
The writing posts official guide is available at this link.
This guide focuses on the basic options for managing contents on uP_running network.
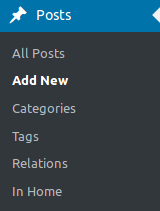
- In admin side click on Posts -> Add New or edit an existing post.
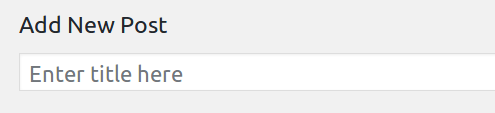
- Publishing / Editing step by step:
- Type the title of your article
- Insert your content on the editor
- Edit mode: you can edit the content in two different modes:
– Visual: this mode allow you to use a simple text editor for manage and formatting your text

– Text: this mode allow you to paste unformatted text and to use custom HTML tags. - Add Media: “Add Media” button allow you to add images or files inside the content of your post.

– Place the cursor in the position where you want to insert an image, then click “Add Media“;
– Click on the image you want to add on the content or upload a file and select it;
– In the sidebar of the media window, define Title, alignment, size and the link of the image (optional);
– Click “Insert into page“. - Add Media (Create a gallery):
– Click “Add Media”
– In the left sidebar, click “Create gallery“, Select images (or “Upload file“), for multiple selection hold down Ctrl or Command on Mac;
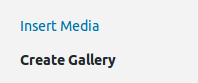
– Complete your selection, then click “Create a new gallery“;
– Select column number, image size and “insert gallery”;
- Edit mode: you can edit the content in two different modes:
- Theme fields
Some of these options are designed for the work of designers, such options are marked with “*”
- Editing “Theme fields“:

General
– Subtitle
– Featured image position (Allow you to choose the featured image position on the single page of the post)
– If listed, shows entire contents (by default, the content will be showed on single post only, this option allow you to show entire content in archives)
Localization & Date / Time
– You can give directions by the localization system (based on google maps, accept coords or address), insert “Date / Time” for events or other contexts using “Title for the date” field.

Attach Files
– Attach files from the media library. A list of attached files will be showed after the post content
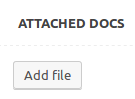
– Note: the “Attach Files” function is different from the action described on “Add Media” step, this option allow you to add a list of attached documents in the footer of the single post. Where a file (or more files) are attached to the post by this option, you can see the download link in the utility links section.
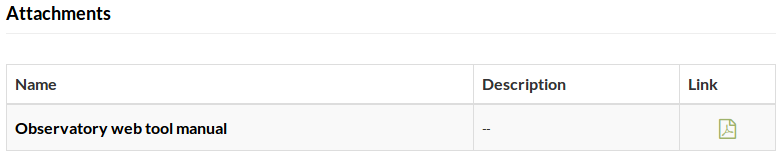
– this is an example of the footer of a post with attached files:
– this is the icon displayed in utility links when a file (or more files) is attached files:
– See also Documents view
Video
– You can connect a video to your post, select the provider where you video is uploaded, then paste the id of your video as described on the examples.

Related settings*
– Use the “Relations” Taxonomy for create relations between multiple published posts. By default the taxonomy used for related posts is “Relations”, by these options, you can edit default taxonomy used, default title and default post type (we use one only post type for our contents on the network: “post“; manage “Post type for related” option it’s useless).
To see how related posts working on frontend, see “Post views (Single / Archive)”

Banner size settings*
– It allows the managing of the size of the post when displayed as a banner (the uP_running sites never provide such an option, it is however available); - Gallery
– This option allow you to create a carousel gallery located in the featured image position on the single post screen (Frontend).
- Editing “Theme fields“:
- Taxonomies Area
When you create / manage a post, you can find taxonomies area in the right side of the screen.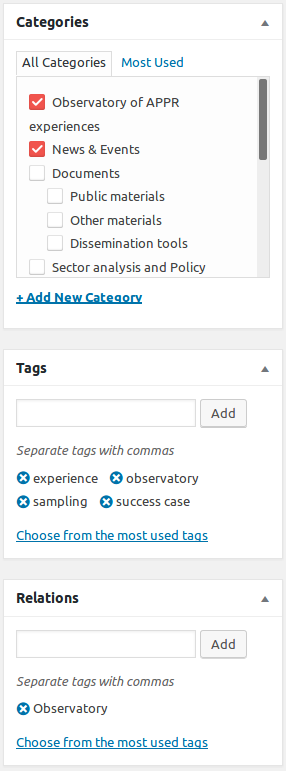
– Taxonomies are used to relate the posts; Articles can be linked through different taxonomies, uP_running allows the use of Categories, Tags, Relatiosn and In Home.
– Taxonomies can be of two types:- Hierarchical (Categories)
– allow you to create categories and sub-categories; - Not Hierarchical (tags)
– All the terms of these taxonomies are on the same level;
- Hierarchical (Categories)
- Define category, tags and other taxonomies terms
An essential step for publication of a post is the choice the terms for taxonomies available; a News, to be published on News & Events must be categorized as “News & Events ”
The terms of taxonomy “category” are the key to publish articles in the right sections.
– Each term (of a public taxonomy) has its own page with all the marked items.- Categories
– Select a categori or create a new one by “Add new category“; - Tags
– Start writing the term, the prompter will show the options available including existing ones, or use the “Choose from the most used tags”; if none of the tags satisfy you, add a new one, when added will be available in the prompter. - Relations
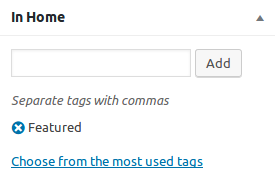
Working like tags, but is a private taxonomy, its only purpose is to establish relationships between related posts (Articles that may be of interest); the terms of this taxonomy does not have archive pages. - In Home
– It too for internal use (private), it allows you to show the post published as a slide on the home page by entering the word “featured”
- Categories
- Featured image
– Select the featured image for the article, you may want to show this item on the home page make sure that the dimensions are optimized for this use (max. width 2560px, min. width 1200; min height 960px)
– You can find the featured image option in the bottom-right of the editing screen
- Type the title of your article
3. Post views (Archive / Single)
A post can be viewed in different ways. The main modes are displaying in archives and single view.
The post can be archived by date, by category or tags:
In some dynamic pages, there are other types of display:
- Minimal way

- As documents
4. Documents view
 Remember: a document displayed in this way it is always a simple article, that can be viewed as the above examples.
5. Media Library
The Media Library is the location where we can see all multimedia file uploaded on our contents.
You can manage all media files by the media button on admin main menu (left side).
A complete guide about WordPress Media Library Screen can be find here.
6. Home Page slider
The Home page slider on uP_running websites can be managed in two ways:
- Add a post on Home Page slider:
To display a post on the home slider you need to add “Featured” to the “In Home” taxonomy on the edit post screen (Right side)
- You can add custom slides from the main admin menu
Slides -> Add Slide
– Define title and content;
– In this screen, above “Theme fields” area, you can locate the “Slide fields” area:- Hide titles
this option allow you to hide title and subtitle of the slider, if enabled, the editor content only will be displayed on the slide caption - Button color
you can define a button color (black or white) for your destination link - Destination link
Paste the URL for your button (if this isn’t set, the button will not displayed) - Caption position
you can set the alignment of the slide caption
- Hide titles
Important: To show a custom slide you must set the value “Featured” for the “inhome” taxonomy, such as the publication of posts on the homepage slider.
A custom slide example:
7. Post on the right section
Dynamic uP_running Pages:
A dynamic page he’s able to show specific categories of content into different sections.
This table help us to publish in the right section of a dynamic page; to be published on a specific page section, the article must be categorized with all listed categories of the current section.
uP_running Main website:
| Page | Section | Categories |
| Project materials |
Sector analysis and Policy recommendations |
|
| “ | Development of new biomass value chains | |
| “ | Capacity building and knowledge sharing | |
| “ | Extending to other regions and countries | |
| “ | Observatory of APPR experiences | |
| Other materials | Single section | |
| Dissemination tools | Single section | |
|
Sector analysis and Policy recommendations
|
News | |
|
“
|
Documents | |
|
Development of new biomass value chains
|
News | |
| “ | Documents | |
| Capacity building and knowledge sharing | News | |
| “ | Documents | |
| Extending to other regions and countries | News | |
| “ | Documents | |
| Observatory of APPR experiences | News | |
| “ | Documents |
8. Edit Pages
Some sections of the site were created using static pages.
Here is a guide to the use of static pages on uP_rinning:
From main admin menu (left side of the dashboard), select Pages, then select the page you want to edit.
The editing screen for pages it’s very similar to editing screen for posts, to set title and content, follow the instructions from Step 2 (Add / Edit Post).
- Page Attributes

In the right side of edit screen, you can set page attributes:- Parent
Set a parent page is useful to create hierarchies between pages; when a page has a parent, the breadcrumbs will propose navigating back to the parent like this

- Template
uP_running provides different templates for its pages, some of them have specific roles, let’s see:- Default template: (sample image).
- Coming Soon:
this page template remove header and footer from the page - Contacts
This page template allows you to display a contact form for your users, the recipient of the message is set in the general options of the theme (to change this option you must be site administrator). uP_running, at the moment, do not use this option for any of its pages. - Work with Us
Is like Contacts page template, allow users to attach a CV to the message. - No Sidebar (sample image).
- Presentation (sample image)
As No Sidebar template, but the contents have bigger font size. - Login / Register
Frontend login and registration page (uP_running allows the registration and login in the comments on all posts)
- Order
You can manage order of pages from “All pages“, by drag an drop function; the advice is to not use this option on the editing screen.
- Parent
- Featured Image
Set a featured image as we did for posts. The image below shows the effect on the page in the frontend
- Extra sections (Coming soon)
The extra sections are undergoing major upgrades to enhance the administrative and editorial experience, for this reason, a definitive guide on using extra sections will be available soon!
- Theme fields
The only option that will have no effect on pages under “Theme Options fields” is “Featured image position.”
9. Stay tuned
For any national website we have create a Mailchimp account connected with the newsletter form of the “Stay tuned” section.
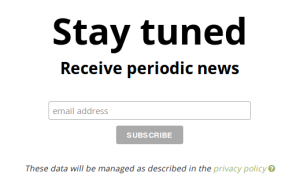
In order to send a notice to all subscribers of a mail list, connect to the Mailchimp profile of your Country with the credentials we provide.
Login page: https://login.mailchimp.com/
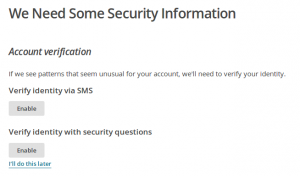
This is not required, but we recommend applying at least one of the security information (optional, to skip this step click on “Campaign”, on the top bar):
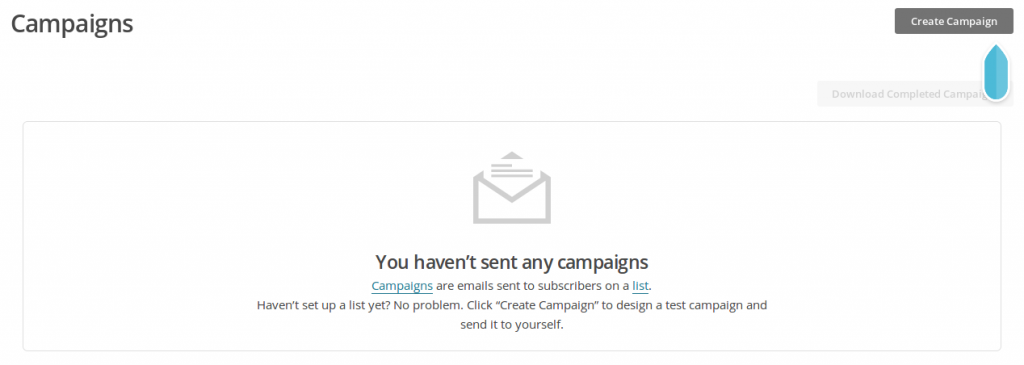
 We have already created a list connected to the website, you only have to create a campaign to be sent to all subscribers, then click “Campaings” on the top bar.
Now you have to create a campaing, then click on “Create Campaign”:
 Type the campaign name (es: “uP_running weekly report”), then select “Regular” in “Campaign type” options.
The next step allow you to select a list (at the moment there is only one choice).
See the bottom bar, we are now on the “Recipient” step:

Click the “Next” button to proceed to the setup board.
Also this step does not require particular changes, because our registration form asks the subscriber the e-mail address only; in other conditions we could set variables that customize the email sent to the subscriber, with the option “Personalize the “To” field”.
All the the tracking options are optimized to report the campaign results.
Set the e-mail subject and proceed to the next board.
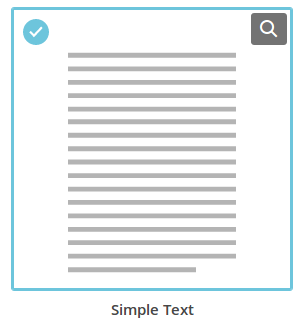
the “Template” section allows us to select different layouts for our email, if you are not familiar with these types of editor, we suggest you to choose the layout “Simple text”:
The design board is very easy to use, it is composed to 3 editable boxes:
- The title
- The content
- The footer
Click on the box and edit it on the right side using the text editor.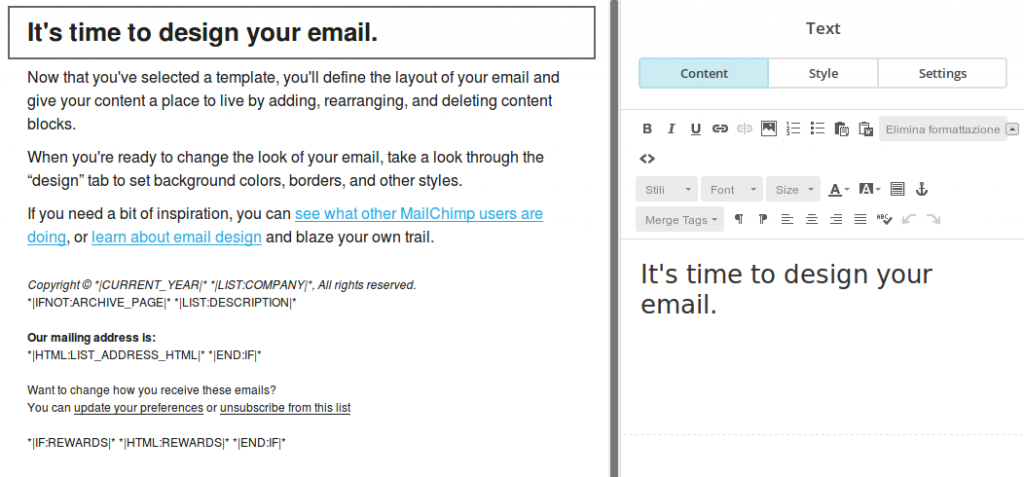
Important! Each Mailchimp profile that we created is connected to a partner in the project, in the footer will have contacts from this partner*.
We can edit the email footer, but with care, should never be deleted from the unsubscribe link and the special tags (*|CURRENT_YEAR|* *|LIST:COMPANY|*).
Scheduled Campaings
The next step allow Us to send the email to our subscribers or schedule it when we want, we can use the “Preview and test” to see the result of your work.
*
Spain: ASAJA HUESCA
Portugal: CONFAGRI
Greece: ΠΑΣΕΓΕΣ
Croatia: HPK
France: Service Coop de France
Ukraine: Український клуб аграрного бізнесу
Italy: DARE PUGLIA
Please, verify the contact informations before sending a campaign! To do this click on “Account” in the dropdown menu on the top-right of the screen, then click on “settings -> Contact Informations”.
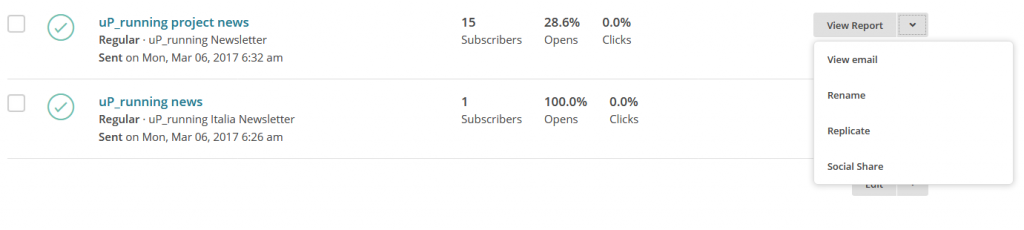
Thanks to the dynamic pages of the website you will be able to communicate updates by replicating the same campaign.
To do this, see the campaigns, click the campaign options button, and select “Replicate”. So you can resubmit a new update to the list of subscribers
Importing email groups
MailChimp allows you to add more subscribers to a list by importing them from a CSV file.
The CSV file format can be edited with Excel or similar programs.
Download the example flie here.
Login with with your MailChimp credential, then click on “Lists” link on the top bar.
On this page you will find an in-depth guide on importing new subscribers in a mailchimp list (you can select your language from the language menu on the top righht of the screen).
The creation and sending of the newsletter is free of charge up to a maximum of 2000 members and 12,000 items in 30 days.